Installing Mac OS X 10.5 on a Lenovo S10e (using a retail DVD)

This content is 15 years old. I don't routinely update old blog posts as they are only intended to represent a view at a particular point in time. Please be warned that the information here may be out of date.

Hackintosh Finder Icon by ~3ncI enjoy installing things that shouldn’t work together and making them work. I’m not clever enough to write the hacks but I’m OK at putting together the constituent pieces of the puzzle (with a little help from Google!). This time, the project was installing Mac OS X on my Lenovo S10e – at around 1.25kg and with a 10-inch display, this could be thought of as the ultimate Mac Mini!

Since I was given permission to install Windows 7 on the notebook PC that I use for work, my netbook (which was purchased for Windows 7 testing… at least until my son inherits it when he needs a PC for school) has been a little under-utilised. But with the MacBook now tethered to a monitor and acting to all intents and purposes as if it’s a desktop PC, the netbook would be a great little web-surfing Mac for use when I’m on the move.

There are plenty of guides for installing OS X on netbooks, but most of them involve downloading cracked distributions of the operating system. The difference here is that I didn’t do that – I used a retail OS X 10.5 (Leopard) DVD instead – and, although it may technically be a breach of Apple’s EULA (I’m no lawyer and, like most normal people, cannot comprehend pages and pages of “small print”), because the software was bought and paid for, I figure it’s at least morally acceptable and my karma should be OK.

I have installed OS X on a non-Apple PC before but the experience wasn’t great. Meanwhile the Hackintosh community has made significant progress, and Boing Boing’s Mac OS X netbook compatibility chart suggested that I should be able to get most of the devices in my S10e working. So, this is my guide to building a small, lightweight, “Mac” notebook , for around £400. Or, to put it another way, about half what you’d pay for an entry-level Apple laptop (MacBook) that’s not as well built.

To do this, you will need:

These are the steps that worked for me (based on John Mahoney’s post linked above – which was itself based on a tutorial on the MyDellMini forum by bmaitais but sadly taken down by Dell – combined with funkobongrip‘s retail install guide for the Lenovo S10e – also linked above):

  1. Prepare the USB Drive:
    • On a Mac, use Disk Utility to create two partitions on the drive – a 200MB FAT32 partition labelled TYPE11 and a Mac OS X Extended (Journaled) partition labelled OSXDVD (and make sure that a GUID partition table is in use).
    • On a Windows PC, run syslinux -ma driveletter: from the win32 folder in the SysLinux download to make the TYPE11 partition bootable (there is no confirmation of success).
    • Extract the contents of the DellMiniBoot123 toolset to the TYPE11 partition, taking care not to overwrite the ldlinux.sys file.
    • Back on a Mac, insert the OS X install DVD and, using Disk Utility, create a new image, saved as live.dmg on the OSXDVD partition (it should be compressed and unencrypted).
    • Extract the System and Library folders from the OSXDVD.zip file (linked above) to the OSXDVD partition (to make OS X think that the USB stick is an actual installation DVD).
    • Copy the kernel from the Mac to the OSXDVD partition using sudo cp /mach_kernel /Volumes/OSXDVD.
    • Extract the OS X drivers for the Lenovo S10e (linked above) to a folder (e.g. Drivers) on the OSXDVD partition.
  2. Boot the S10 from the USB drive and press Fn+F3 until the display appears on the external monitor (only).
  3. Select the OSXDVD boot option (I have a feeling that DellMiniBoot123 should have given me a menu option to do something with the TYPE11 partition but it didn’t seem to, which I put down to the fact that I wasn’t running it on a Dell Mini – and v8.02beta produced a kernel panic, so getting anything working with v8.01 was a huge step forward – I’ve since read that 8.01 is for OS X 10.5.5 and earlier DVDs, 8.02 is for 10.5.6).
  4. The OS X Installer should run and, on the welcome screen, select Disk Utility from the Utilities menu.
  5. Partition the hard disk (I created a single Mac OS X Extended (Journaled) partition called Macintosh HD and exit Disk Utility.
  6. Continue the installation as normal and when it completes, allow the system to boot from the USB drive.
  7. At the boot: prompt, press the Esc key, then type 81 (for the second hard disk – I spent ages trying to work out why 80 wouldn’t work for me – but my USB drive was showing up as the first hard disk in the system so 81 was the internal hard drive).
  8. Back at the boot: prompt, press Fn+F3 until the display appears on the external monitor (only) and type -f -s -v to bring the system up in single user (verbose) mode, loading all kernel extensions (.kexts).
  9. Enter the following commands:
      /sbin/fsck -fy (and look for the volume name Macintosh HD – if it’s something like OS X Installation DVD then you are working on the USB drive!)
      /sbin/mount -uw /
      cd /System/Library/Extensions/IO80211Family.kext/Contents/PlugIns/AppleAirPortBrcm4311.kext/Contents
      nano Info.plist
  10. Insert <string>pci14e4,4315</string>
  11. (in sequence with the similar PCI device IDs) then save and exit Info.plist.

  12. Enter the following commands:
      cd /System/Library
      rm Extensions.mkext
      exit
  13. At this point, the OS X installer should continue, setting up the regional and keyboard settings, before presenting the option to transfer information from another Mac. I chose not to transfer information and was unable to connect to my wireless network (it eventually failed). The installer then moved on to allow me to complete registration details (not submitted), take a picture with the camera (for my account details) and set the timezone.
  14. Mount and run Chameleon_DFE_for_Hard_Disk.dmg from the /bootloader folder (in the S10e drivers archive).
  15. Run Kext Helper from the /tools folder (in the S10e drivers archive) and install the kernel extensions found in the /driver/system folder (AppleACPIBatteryManager.kext; AppleACPIPlatform.kext; AppleDecrypt.kext; ApplePS2Controller.kext; AppleSMBIOS.kext; and Disabler.kext).
  16. Restart the system and boot from the internal hard disk (on my system that was hd (0,2) Macintosh HD), then press the return key at the boot: prompt.
  17. Run Network Diagnostics to join a WiFi network.
  18. Run Software Update to upgrade to OS X 10.5.6.
  19. After rebooting there will be no WiFi, so enter -s -v at the boot: prompt and repeat steps 9-11. As the machine boots up you should see a message about the link being up on en0 (even link down shows that the device has been found!).
  20. Apply other software updates (for me that was Airport Utility v5.3.2; Airport Utility Software Update v5.41; QuickTime v7.6; iTunes v8.0.2; iLife Support v9.0.1; Airport Client Updater 2009-001 v1.0; Jave for Mac OS X 10.5 Update 2 v1.0; Safari v3.2.1; and Security Update 2009-001 v1.0) – if the downloads appear to have stuck, nudge the trackpad and the screen should refresh!
  21. After restarting there will be no WiFi, so enter -s -v at the boot: prompt and repeat steps 9-11.
  22. Using Kext Helper, install one of the sets of kernel extensions found in the /driver/display folder (in the S10e drivers archive) – I used the option with brightness controls but no mirroring (AppleIntelGMA950.kext and AppleIntelIntegratedFramebuffer.kext) and copy the com.apple.Boot.plist file to /Library/Preferences/SystemConfiguration.
  23. Restart the system and it should should start up with no requirement to select a boot option, running at 1024x576px with 32-bit colour depth.
  24. Using Kext Helper, install one of the sets of kernel extensions found in the /driver/fan folder (in the S10e drivers archive) (AppleACPIPowerSource.kext and AppleACPIThermal.kext), then copy the DSDT Patcher utility to a temporary folder, run it (selecting 0 for Darwin when prompted) and copy the resulting dsdt.aml file to the root folder on the internal hard disk.
  25. Restart the computer and, using Kext Helper, install one of the sets of kernel extensions found in the /driver/sleep folder (in the S10e drivers archive) (ClamshellDisplay.kext and EHCISleepEnabler.kext).
  26. Edit /System/Library/Extensions/IOUSBFamily.kext/Contents/PlugIns/AppleUSBEHCI.kext/Contents/ to include:
      <key>OSBundleCompatibleVersion</key>
      <string>1.0</string>

    under:
      <key>CFBundleVersion</key>
      <string>3.1.5</string>
  27. Replace the depency in AppleACPIThermal.kext by editing /System/Library/Extensions/AppleACPIPlatform.kext/Contents/PlugIns/AppleACPIThermal.kext/Contents/Info.plist to change the depency version below the key com.apple.driver.AppleACPIPlatform to 1.2.4 (from 1.2.1).
  28. Restart the computer and install CHUD.pkg and AzaliaAudio.pkg from the /driver/sound folder (in the S10e drivers archive).
  29. Restart the computer and run Audieee from the /driver/sound folder (in the S10e drivers archive).
  30. Run OSX86Tools from the /tools folder (in the S10e drivers archive) to modify the CPU information in About This Mac (e.g. 1.6GHz Intel Atom).
  31. Finally, restart the computer – and hopefully, you now have a Hackintosh!
  32. About This Mac - on a netbook

Notes

  • This post is based on the work of a lot of clever people to whom I’m very grateful for sharing their experiences – I hope I’ve credited them all!
  • I’ve been running this for just over a week now and it seems pretty solid but your mileage may vary.
  • There seems to be a game of cat and mouse going on whereby posts are added to the MyDellMini Forums (this advice can be adapted for the Lenovo S10), then taken down (like this one), then new ones appear. Since I got my system running I found this comprehensive thread.
  • I still have to get some things working: if I let the machine go to sleep without switching off Bluetooth (using the button above the keyboard), it may not come back; and I have no wired Ethernet connection (only WiFi). There may be other items too that I have not noticed but I do have the following working: TrackPad; keyboard (although some of the key mappings are incorrect on a UK keyboard – Apple keyboards have the @ and the ” in the wrong places – even on the UK variants); display (1024×576); WiFi; Bluetooth; audio; camera; SD card reader; and ExpressCard slot.
  • Some dialogue boxes have buttons that appear off screen – this trick to scale the resolution may help (I haven’t tried it yet).
  • The Kitch has also written about installing Mac OS X on a Lenovo S10 or a Dell Mini 9 and the everyday Mac netbook. The menooB Hackintosh tutorial for installing a Mac Leopard OS X Retail DVD on a PC might also be useful.

Why blog feeds should include the whole post (and not just an excerpt)

This content is 15 years old. I don't routinely update old blog posts as they are only intended to represent a view at a particular point in time. Please be warned that the information here may be out of date.

I’m trying to catch up on a four-month blog reading backlog (I was incredibly busy at work at the back end of 2008/early 2009 and switched roles in February… only now am I making the time to catch up on the things that have gone by in the intervening period). One thing I noticed (apart from that Google Reader has marked a bunch of posts as read… even though I haven’t read them) is that, in order to stand any chance of catching up, I need to be able to skip through posts and read them in my reader.

Some of the blogs (like the Office Offline comic) have recently switched from publishing the whole post in the feed to just publishing an excerpt. Even worse, if I go to the web page, there is no way to easily navigate forwards and backwards between posts… just a single post on each page. Ultimately that means it’s too slow for me to read it… so I won’t. (OK, I could start at the home page and read 10 posts at a time, next, next, etc.).

Other examples include prominant writers like Paul Thurrott and Mary-Jo Foley, whose editors may want me to visit their websites to click on ads and jump to other posts, but the whole point of an RSS subscription is that it should be easy for me, with the content delivered to my reader, in full (even if it means that ads need to be run in the feed… which, coincidentally, is something I’m trialing here).

If you can’t make life easy for your readers, ultimately you’re limiting your audience. Still, at least it means I have a few less posts to read each morning…

Where does Citrix Essentials for Hyper-V fit in with SCVMM?

This content is 15 years old. I don't routinely update old blog posts as they are only intended to represent a view at a particular point in time. Please be warned that the information here may be out of date.

Last month, as VMware prepared for their European conference, news of Citrix setting XenServer free and providing new management tools for Hyper-V was leaked. After the recent announcement of a beta for Microsoft System Center Virtual Machine Manager (SCVMM) 2008 R2, I decided to read up on the official announcement from Citrix to see how the Microsoft and Citrix management products fit in with one another.

First of all, to summarise the Citrix announcements last month, as well as announcing that the XenServer hypervisor will be free of charge, Citrix announced a 20-year collaboration project with Microsoft (Project Encore) as part of which they will release new management tools (Citrix Essentials – available for XenServer and for Hyper-V) and Microsoft will support XenServer in a future version of SCVMM.

The official coverage of the Citrix Essentials announcement also includes videos featuring Simon Crosby, CIO of the Virtualisation Management Division at Citrix and Mike Neil, the General Manager for Virtualisation at Microsoft. In one video, Crosby says that:

“You’ve known us as the guys who made the hypervisor free – that’s what Xen stood for and we’ve been partners with Microsoft with Hyper-V to make exactly the same true in the Windows world.

This is not about free hypervisors anymore – this is about free enterprise virtualised infrastructure, containing multiple servers, shared storage, live relocation – everything that you need to build, in production, enterprise class virtualised infrastructure is now free. It’s a game changer for the virtualisation industry because it completely changes the cost of adopting virtualisation.”

After saying how Citrix was setting everything free, Crosby contradicts himself by saying that it’s basically the hypervisor that’s free but that there’s a management suite (Citrix Essentials) that’s chargeable… (so the “essential” part is not free then!)

Even so, it’s a significantly lower price point than the last time I looked at VMware Virtual Infrastructure (which is the real point Citrix are trying to make), and Citrix Essentials will provide extra functionality, some of which would require the purchase of additional products from VMware:

  • Automated lab management – to streamline the process of building, testing, sharing and delivering throughout the application lifecycle, from development labs into the production environment.
  • Advanced storage integration – to expose advanced data and storage management features directly to a virtualized environment.
  • Dynamic provisioning services – for the on-demand deployment of workloads to any combination of virtual machines or physical servers from a single image.
  • Workflow orchestration – for the simplified scripting to automation of key management processes.
  • High availability – for the automatic restart and intelligent placement of virtual machines in case of failure of guest systems or physical servers.

But some of this functionality is also available in SCVMM, so how does Citrix Essentials for Hyper-V fit with the Microsoft Virtualization portfolio? That’s explained in another video, where Crosby highlights that:

“Citrix Essentials is a management pack of solutions that complement System Center VMM, adding value in areas relating to storage automation, lab automation and VM lifecycle automation that are entirely complimentary to the use cases that are part of System Center VMM today”

He continues to explain that, in terms of multivendor platform management, SCVMM is forging ahead and Citrix’s objective is to complement the Microsoft products by filling in the key areas of automation that are not part of the virtualisation management role (e.g. storage, lab and stage management), to complement Hyper-V and to co-exist with SCVMM.

Mike Neil explained that the Microsoft Virtualization platform is designed to be layered with the base hypervisor functionality provided in Windows Server and the System Center products layered on top to manage the virtual and physical machines, their operating systems and applications. This infrastructure is designed to be extended by partners and Citrix has taken advantage by producing Citrix Essentials for Hyper-V.

It helps that XenServer and Hyper-V are compatible at the hypervisor layer (indeed, Citrix developed the Linux integration components for Hyper-V). Citrix Essentials is intended to ensure that, whether there’s a Citrix or a Microsoft hypervisor in use, the same automation and capabilities are available for all workloads (and SCVMM can manage VMware ESX and ESXi hosts too, via Virtual Center).

Citrix Essentials for Hyper-V will go on sale in April 2009, priced at around $1500 per server.

System Center Virtual Machine Manager is available today from Microsoft, with attractive licensing arrangements (the Server Management Suite Enterprise) for customers deploying multiple System Center products.

Hyper-V is available as a role for 64-bit editions of Windows Server 2008 and as a standalone product offered free of charge (Hyper-V Server 2008).

Managing your digital life

This content is 15 years old. I don't routinely update old blog posts as they are only intended to represent a view at a particular point in time. Please be warned that the information here may be out of date.

Writers/podcasters/photographers/tech-guys Andy Ihnatko and Scott Bourne have kicked off a new blog (soon to be followed up with a podcast) called MYDL.me (MyDL is Manage Your Digital Life… not to be confused with the established tech blog My Digital Life, which, like LifeHacker, is one of my favourite blogs but I rarely read it because the content is produced faster than I can consume it!). The idea with MYDL is that the blog will support the podcast, which will discuss topics around… you guessed it… managing your digital life.

It’s early days yet but Andy’s Backup In Progress post makes some good points… I just wish it would dig a little deeper and provide some real guidance – hopefully that will come later but that’s why the jury’s still out on this one.

Announcing System Center Virtual Machine Manager 2008 R2

This content is 15 years old. I don't routinely update old blog posts as they are only intended to represent a view at a particular point in time. Please be warned that the information here may be out of date.

System Center Virtual Machine ManagerIt doesn’t seem like five minutes since Microsoft released System Center Virtual Machine Manager (SCVMM) 2008 but it appears that the SCVMM team is on a swift development cycle as, yesterday, Microsoft announced availability of a beta for System Center Virtual Machine Manager 2008 R2.

Details are still a little sketchy but some of the new features and functionality included in SCVMM 2008 R2 are:

  • Support for the new features in Windows Server 2008 R2, including:
    • Live Migration: Enables the movement of running virtual machines from one virtual host to another with no downtime.
    • Hot addition/removal of VHDs: Allows the addition and removal of new virtual hard disks (VHDs) on a running virtual machine.
    • New networking protocols: Virtual Machine Queue (VMQ) and TCP Chimney.
  • Streamlined process for managing host upgrades: Controlling the application of updates or performance of maintenance on a host server by safely evacuating all virtual machines to other hosts on a cluster using live migration or by putting those workloads into a saved state to be safely reactivated when maintenance or upgrades are complete. Maintenance mode is enabled for all supported platforms Hyper-V on Windows Server 2008 R2.
  • Support for Virtual Desktop Infrastructure (VDI): Enables administrators to deploy and manage virtual desktop infrastructure (VDI) in their data center environment.
  • Support of disjoint domains: Reduces the complexity of reconciling host servers with differing domain names in Active Directory and DNS. In these situations, SCVMM 2008 R2 automatically creates a custom service principal name (SPN) configured in Active Directory and DNS to allow for successful authentication.
  • Use of defined port groups with VMware Virtual Center: On installation, SCVMM 2008 R2 will present available port groups for SCVMM’s use – allowing administrators to maintain control over which port groups are used.

Rakesh Malhotra has more information on his blog.

Availability of System Center Virtual Machine Manager 2008 R2 is yet to be confirmed; however I would expect this to follow shortly after Hyper-V v2 (which should be in Windows Server 2008 R2). Also missing from the current feature list is the ability to manage Citrix XenServer hosts – something else which we can expect to see following Citrix and Microsoft’s joint announcements last month.

For those interested in taking a look at the beta of SCVMM 2008 R2, it is available via Microsoft Connect.

For organisations that don’t want to run a beta but would like to take a look at the existing release (SCVMM 2008), there is a fully-functional 180-day trial available on the Microsoft website (also available as a pre-configured virtual hard disk) and demos of the various features in SCVMM 2008.

Archive Google Mail to a Mac using getmail

This content is 15 years old. I don't routinely update old blog posts as they are only intended to represent a view at a particular point in time. Please be warned that the information here may be out of date.

Late last year I questioned the wisdom of trusting critical data to the cloud and cited Google Mail as an example. Whilst the Google Mail service is generally reliable, there have been some well-publicised instances of failure (including data loss). I shouldn’t be too alarmed by that – for many things in life you get what you pay for and I pay Google precisely nothing (although they do get to build up a pretty good profile of my interests against which to target advertising…). So, dusting off the motto from my Scouting days (“Be Prepared”), I set about creating a regular backup of my Google Apps mail – just in case it ever ceased to exist!

I already use the Apple Mail application (mail.app) for IMAP access but I have some concerns about mail.app – it’s failed to send messages (and not stored a draft either) on at least two occasions and basically I don’t trust it! But using Mac OS X (derived from BSD Unix) means that I also have access to various Unix tools (e.g. getmail) and that means I can take a copy of my Google Mail and store it in maildir or mbox format for later retrieval, on a schedule that I set.

The first step is to install some Unix tools on the Mac. I chose DarwinPorts (also known as MacPorts). After running the 1.7.0 installer, I fired up a terminal and entered the following commands:

su - Administrator
cd /opt/local/bin
sudo ./port -d selfupdate

This told me that my installation of MacPorts was already current, so set about installing the getmail port:

sudo ./port install getmail

The beauty of this process is that it also installed all the prerequisite packages (expat, gperf, libiconv, ncursesw, ncurses, gettext and python25). Having installed getmail, I followed George Donnelly’s advice to create a hidden folder for getmail scripts and a maildir folder for my GmailArchive – both inside my home directory:

mkdir ~/.getmail
mkdir ~/GmailArchive/ ~/GmailArchive/new ~/GmailArchive/tmp ~/GmailArchive/cur

I then created and edited a getmail configuration file at ~/.getmail/getmailrc.mygmailaccount) and entering the following settings:

[retriever]
type = SimpleIMAPSSLRetriever
server = imap.gmail.com
username = googleaccountname
password = googleaccountpassword

[destination]
type = Maildir
path = ~/GmailArchive/

[options]
verbose = 2
received = false
delivered_to = false
message_log = ~/.getmail/gmail.log

I tested this by running:

/opt/local/bin/getmail -ln --rcfile getmailrc.gmailarchive

but was presented with an error message:

Configuration error: SSL not supported by this installation of Python

That was solved by running:

sudo ./port install py25-socket-ssl

(which installed zlib, openssl and py25-socket-ssl), after which I could re-run the getmail command and watch as my terminal session was filled with messages being downloaded (and the folder at ~/GmailArchive/new started to fill up). Then I saw a problem – even though I have a few thousand messages, I noticed that getmail was only ever downloading the contents of my Inbox.

Eventually, I solved this by adding the following line to the [retriever] section of the getmail configuration file:

mailboxes = ("[Google Mail]/All Mail",)

This took a while to work out because many blog posts on the subject suggest that the mailbox name will include [GMail] but I found I needed to use [Google Mail] (I guess that could be the difference between GMail and the Google Mail service provided as part of Google Apps). After making the change I was able to download a few thousand messages, although it took a few tries (the good news is that getmail will skip messages it has already retrieved). Strangely, although the Google Mail web interface says that there are 3268 items in my All Mail folder, getmail finds 5320 (and, thankfully, doesn’t seem to include the spam, which would only account for 1012 of the difference anyway).

In addition, the getmail help text explains that multiple mailboxes may be selected by adding to the tuple of quoted strings but, if there is just a single value, a trailing comma is required.

Having tested manual mail retrieval, I set up a cron job to retrieve mail on a schedule. Daily would have been fine for backup purposes but I could also schedule a more frequent job to pull updates every few minutes:

crontab -e

launched vim to edit the cron table and I added the following line:

4,14,24,34,44,54 * * * * /opt/local/bin/getmail -ln --rcfile getmailrc.gmailarchive

I then opened up a terminal window and (because running lots of terminal windows makes me feel like a real geek) ran:

tail -f ~/.getmail/gmail.log

to watch as messages were automatically downloaded every 10 minutes at 4, 14, 24, 34, 44, and 54 minutes past the hour.

This also means that I get 6 messages an hour in my the local system mailbox (/var/mail/username) to tell me how the cron job ran so I chose to disable e-mail alerting for the cron job by appending >/dev/null 2>&1 to the crontab entry.

Many of the posts on this subject suggest using POP to download the mail, but Google limits POP transfers so it will require multiple downloads. Peng.u.i.n writes that IMAP should help to alleviate this (although that wasn’t my experience). He also suggests using several mbox files (instead of a single mbox file or a maildir) to backup mail (e.g. one file per calendar quarter) and Matt Cutts suggests backing up to mbox and maildir formats simultaneously:

[destination]
type = MultiDestination
destinations = (’[mboxrd-destination]‘, ‘[maildir-destination]‘)

[mboxrd-destination]
type = Mboxrd
path = ~/GmailArchive.mbox

[maildir-destination]
type = Maildir
path = ~/GmailArchive/

If you do decide to use a mbox file, then it will need to be created first using:

touch ~/GmailArchive.mbox

In Chris Latko’s post on pulling mail out of Gmail and retaining the labels, he describes some extra steps, noteably that the timestamps on mail are replaced with the time it was archived, so he has a PHP script to read each message and restore the original modification time.

Aside from the MacPorts installation, the process is the same on a Unix/Linux machine and, for Windows users, Gina Trapani has written about backing up GMail using fetchmail with Cygwin as the platform.

Sometimes I really do wonder why I bother…

This content is 15 years old. I don't routinely update old blog posts as they are only intended to represent a view at a particular point in time. Please be warned that the information here may be out of date.

It’s a new day and the sun is shining, I spent some time playing with my kids before starting work – I should be in a good mood.

Except I’m not… I’m actually feeling quite insecure – and one of the reasons is the comments I get about this blog.

Last week I wrote a piece about getting Vodafone Mobile Connect working on a Mac. In that post I linked to someone who had managed to speak to a suitably skilled technician at Vodafone who talked him through the process of installing the application as the root user. Thankfully that person blogged about their experience, I found his post on the ‘net and it helped me, so I did my bit to spread the message. Then somebody (for whom I can apply several four-letter words… but I won’t in public) leaves a comment which says:

“This bears no resemblance to my experiences. I have installed VCM [sic] on about 100 Mac Laptops now and have never, ever had to use the method you describe.

The standard installation works fine and is a hassle free process.

I get the feeling you are making a simple installation process complicated by looking for problems where there are none.

Your advice is incorrect and you really should not attempt to act as a source of knowledge on subjects you know nothing about.”

Well, great, 15 years in IT (not including the time spent in education before that), over 1300 posts on this blog, some of which have apparently been useful to others, and now the insults start to arrive. I responded, then stewed about it for a while, before deciding that I have better things to worry about and to ignore the comments… until I heard that my efforts aren’t necessarily appreciated by technology companies either…

…a few weeks back, I was sent some information from a (very large) technology company in which the e-mail said “please cascade as appropriate”. I thought that the information would be of interest to people reading the blog (even though there’s a lot of stuff I chose not to write about) but it seems that some people in the company thought I had breached an NDA (I did not and would not – indeed I have many blog posts stored up that I can’t publish yet because of such agreements) and that small blogs (written by real people) shouldn’t be reporting things that company blogs (written by marketing departments) should be spinning. I double-checked my source – it definitely said cascade as appropriate, which meant I was in the clear – phew! (Furthermore, thankfully, there are people inside that technology company who have been prepared to defend my position).

Right now it seems that I have a blog which is neither small enough to just take a few hours a week, nor large enough to pay the bills. If I write about real world experiences with technology, I get flamed by fanboys who tell me I don’t know what I’m talking about; meanwhile if I write about technology subjects that are less “hands on”, then the companies those posts relate to get jumpy. It seems I can’t win.

I spend a huge about of time writing on this blog and if I work out how much it pays me then it’s well below the minimum wage so it’s certainly not worth it from a financial perspective. I used to find the writing therapeutic but now it’s just something else that I don’t have time for in my day. I need a break… especially if all I’m doing is creating Internet noise. It would be a shame to undo 5 years’ work and to pack it in, but sometimes really do I wonder why I bother…

Microsoft PowerShell, VBScript and JScript Bible

This content is 15 years old. I don't routinely update old blog posts as they are only intended to represent a view at a particular point in time. Please be warned that the information here may be out of date.

At last night’s joint user group meeting for the Windows Server UK User Group and the Active Directory UK User Group, James O’Neill mentioned that the book he has co-authored (Microsoft PowerShell, VBScript and JScript Bible, published by John Wiley and sons) goes on sale today.

I haven’t had the chance to review it yet but knowing how immersed James is in PowerShell (and that he wrote the PowerShell sections), I would suggest this might be worth considering if you are looking for a good reference book.

A source of great icons for presentation materials

This content is 15 years old. I don't routinely update old blog posts as they are only intended to represent a view at a particular point in time. Please be warned that the information here may be out of date.

My colleague Alan Dodd (who works as the technology lead for Unix/Linux at the same company where I look after the Microsoft infrastructure) let me in on the source for his super-cool presentation graphics this week… Gnome/KDE icon sets! Sites like GNOME Look and KDE Look are full of fantastic artwork (some of it scalable), much of which is available under various copyleft licensing agreements and is great for illustrating otherwise dull PowerPoint slides that try to explain IT infrastructure concepts.

Getting Vodafone Mobile Connect and Mac OS X to play nicely together

This content is 15 years old. I don't routinely update old blog posts as they are only intended to represent a view at a particular point in time. Please be warned that the information here may be out of date.

VodafoneA couple of years back, I wrote about getting Vodafone Mobile Connect (VMC) to work with Windows Vista and today, after spending most of my train journey from Milton Keynes to Crewe trying the same on a Mac (it’s actually a hackintosh… but that’s of little consequence here), it seems I need to repeat the experience for the benefit of Mac users.

It seems that, even with the latest version of Vodafone Mobile Connect (I’m using v2.11.02.00 on OS X 10.5.6) it’s necessary to run the application as the root user (yes, root!) the first time it is used.

Thankfully, Ian Jindal thought to write about his experiences with Vodafone Mobile Connect on the Mac (which he referred to as inept and unnecessary), summarised as:

  1. Install VMC (I did this as a standard user).
  2. Enable the root user account (with a password of root) in Directory Utility.
  3. Log out and log back in as root.
  4. Run VMC (I tested the connection at this stage too).
  5. Disable the root user.
  6. Log out and log back in using a standard user account.

Once you’ve done this, it should be possible to connect to Vodafone as required using the appropriate connection in the network preferences. The software might not be up to scratch, but the network is generally pretty good (in fact, it’s better than the corporate connection I’ve been on all day!).

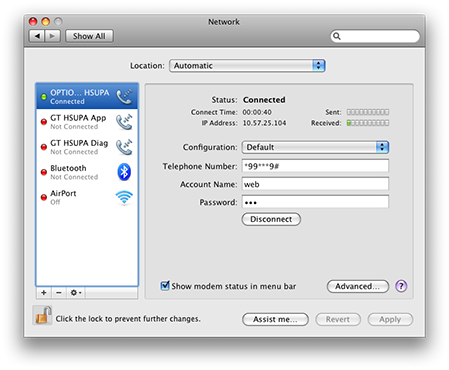
Vodafone 3G connection on Mac OS X

I’m writing this at the station so let’s see how I get on as I make my way home courtesy of Virgin Trains (who I noticed were advertising an enhanced connection for Orange customers on some of their trains, but there’s no mention of anything for Vodafone).
Vodafone USB Broadband